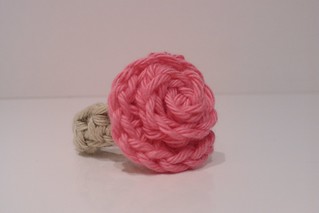
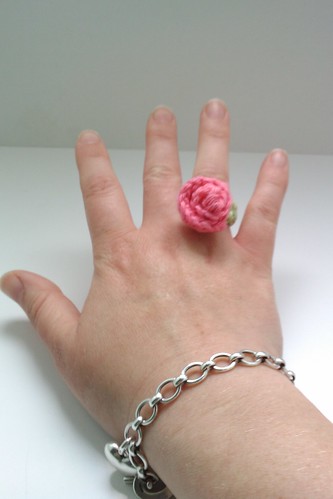
Cotton Rose ring
Pattern by Haylees Hats
Materials
2 shades of 100% cotton 4 ply. 1 shade green and other shade rose colour of your choice.
Tapestry needle
scissors
3.00mm Hook
Stitches
(Written in american terms)
HDC - Half double crochet
Ch - Chain
st - Stitch
Step 1
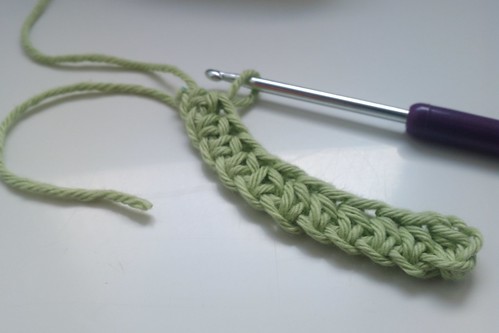
Starting with a slip knot Ch12 (to make a larger band Ch15)
Step 2
HDC
in 2nd ch from hook and each st to end. ( 11HDC) for larger size
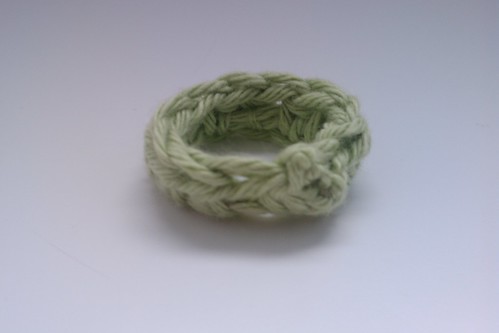
(14HDC) fasten off leaving a long tail end to sew together the two ends
to create a band. Insure you weave in your beginning tail end
first.Weave in tail end and break away.
Step 3 (making the rose)
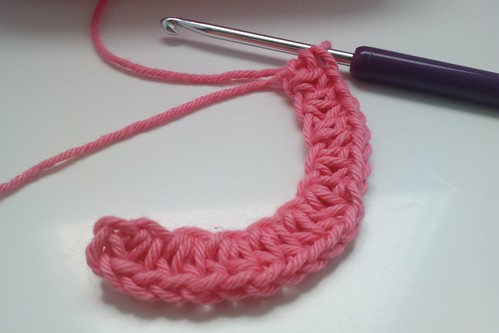
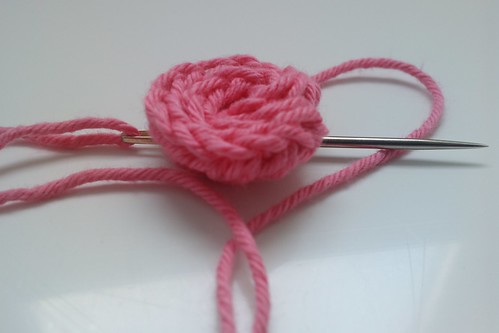
Start with a slip knot CH11
2HDC in 2nd ch from hook and each st to end (20HDC)
coil
to make a rose shape and sew together to prevent it from uncoiling.
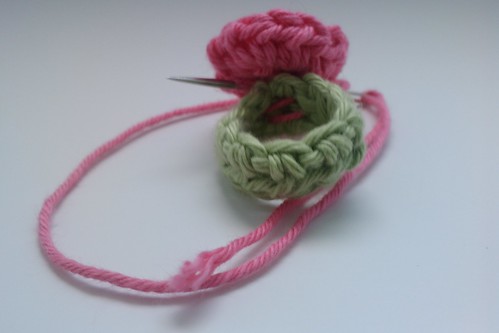
Next sew the rose onto the band at the join (this is where you joined
the two band ends together) Once your rose is secured to the band, weave
in the end and break away.
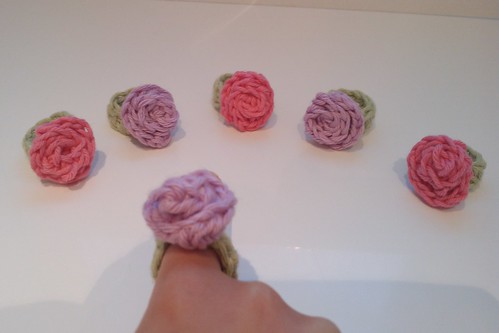
Congratulations you have made your beautiful cotton rose ring. Enjoy!
Top Tip!
Keep
your tail ends and use this to tie your ring to a card. This will look
great as a gift or will look presentable for your customers.
You
may sell the rings you make from this pattern. Please put a link with
any photos of your ring to this blog pattern. This will help fellow
crocheters to find this pattern and any other free patterns I create. This pattern may not be reproduced or sold. It is free and designed and written by Haylee Hibbert of Haylees Hats.
Thank you.
Photo Tutorial
CH12
11HDC
weave in beginning tail end.

Join the two ends sew together to form a ring.

Weave in end and break away.
20HDC
Coil together to make a rose shape and sew together to prevent it from uncoiling.
sew the rose to the band, weave in end and break away.
Top Tip!


Thank you to all my pattern testers.Thank you Michelle Jones for your quick response. Your ring turned out Lovely. xx
You can also watch a video tutorial by clicking here.
No comments:
Post a Comment